Showing posts with label candles. Show all posts

7.14.2017

DIY Zodiac Candles

I'm convinced this was the fastest week in history. I had this big list of things to accomplish and pretty much threw it out the window, preferring to relax instead. I tried to stay inside, away from the sticky heat and occasional rain that hasn't really brought relief (but it has brought me tiny tomatoes that are growing--a miracle for this wanna be gardener). I decided to make my space as comfy as possible, and burned some candles instead. Speaking of candles, allow me to introduce my DIY ZODIAC CANDLES.


The idea for these started out as a need for a gift for a friend. She's one of those that has everything, and just happens to be a candle fanatic like I am. I began to research her sign, the scents that would go well with that sign, and it snowballed from there. SHE LOVED IT! It was such a hit, I've made them for many others, using different designs for the label and even trying out different scent and color combos. These take no time at all to make and are just a little something extra special.


You'll need:

wax
essential oil(s)
wick
glass container
label (printer and ink for label)

To make:

If you're reading this, I'm guessing you aren't a professional candle maker. This is the quick and easy version, y'all.

Glue the wick to the bottom of the glass candle container.

Take an old candle or candle wax and melt.

Carefully pour into the glass container.

Add a few drops of essential oil just for your zodiac sign (I used the list here) and stir.

Hold the wick in place by wrapping it around a pencil placed horizontally on top of the candle container. Use tape to hold it in place if needed and allow to cool completely. Trim wick.

Use sticker paper (I used clear) or labels to make your own design.


I've made these all sorts of ways--the possibilities are endless--but for this I wanted a minimalist design and white candles. I'm a Libra, so I chose vanilla, almond, and oak moss for mine.


What's your sign?
Does it describe you?

PS: Want to buy one instead? I'm selling these for $10 each. Email me!

1.26.2017

DIY Sprinkles Candle With a Surprise Inside


Since January is practically over, I thought I'd go ahead and share some Valentine's Day DIYs, starting with this adorable DIY Sprinkles Candle! I've shared sprinkles candles before, but this one has a surprise inside, making it a fun treat for Valentine's Day, a birthday, or just something to cheer you up after scrolling through the negativity on Facebook. Just me? 

These are really easy! Here's what you'll need--


Materials:

glass container (I reused an empty candle jar)

wax (I used soy)

candle dye (I used crayons, but you can use color blocks, pigments, or liquid candle dye)

wick

sprinkles

Karo syrup

fragrance (optional--mine smells like birthday cake!)

surprise treat

Don't forget--double boiler, oven mitts, glass containers for melting, glue, something to hold the wick in place, scissors for cutting the excess wick, tin foil


First, you'll glue the wick down to the bottle of the candle jar. Next, coat the inside with a thin layer of Karo syrup. I like the light version since it's pretty clear. You can use a finger or brush. Next, add the sprinkles! Shake out excess.

Melt your wax, preferably in a double boiler on the stove. At the end, add the color and fragrance and stir. Once it has melted, carefully pour into the candle. If it's too hot, like boiling, it will melt the candy sprinkles off. Make sure you have something to hold the wick in place while it's cooling down. I taped two straws together and slid the wick through them.

If you want a surprise inside, you can either purchase clear containers online and fill or get something from one of those toy machines. Wrap the container in a little tin foil. Pour in wax to desired amount. Allow to cool before adding in surprise. Then pour the rest of the wax on top. Allow to cool and don't forget to trim the wick!


How cute is this? It makes for a fun decor item or as a great gift--it's a hit for birthdays. You can buy different colored sprinkles, too! Don't forget to use caution when burning a candle. Enjoy!

Extra Elle:
Did you ever get those toys out of a coin machine when you were little? I have actually saved one for over 20 years! When one of my brothers was 5 (he's 26 now), he bought me one as a gift--it was the first time he'd ever bought me anything. I am much older than him, so it was an especially sweet gesture. Now he's a married man with kids, so he's busy and we don't talk as much. But that little container of earrings that cost a quarter is always with me as a good luck charm of sorts.


12.16.2016

60+ DIY Ideas For Bath, Body, Home


There are only a few days until Christmas, y'all. And I know there are some of you out there who need to bookmark (or Pin!) this post for those last minute/I-totally-forgot-to-get-her-a-gift scenarios.

Over the 6 years I've been blogging at Elle Sees, I've shared with you for FREE around 200 DIY ideas. It's been a fun walk through memory lane--let's not even talk about how awful my pictures used to be!

Many of these recipes have been published in magazines and online, like Buzzfeed and PopSugar. All of them subscribe to my diy philosophy of easy, fast, and inexpensive. Let me know which one of these you'd try:


Sugar Scrubs, Salt Scrubs

Orange Crush Salt Scrub (love this on hands)

Birthday Cake Sugar Scrub

Lemonade Mint Sugar Scrub

Sno-Cones Sugar Scrubs

Coconut Lime Sugar Scrub

Salt Shaving Scrub (use this to exfoliate prior to shaving)


Peppermint Mocha Sugar Scrub (pictured above)


Bath Salts, Solid Perfume, Body Butters


Bath Bombs


Shower Fizzing Bath Bombs (great for when you're sick)


Funfetti Bath Bombs (confetti inside)


Lip Products

DIY Solid Lip Scrub (just like ELF, but you can make this for FREE)

DIY Lip Butters (inspired by Nivea)

DIY Santa's Lip Scrub (just like Lush)


Solid Lotion Bars


These don't get as many views when I post on them, but they're awesome! And I've made marshmallow and chocolate lotion bars on there as well.

Solid Sugar Scrubs


DIY Sprays


DIY Shower Jellies


DIY Candles


DIY Home Crafts


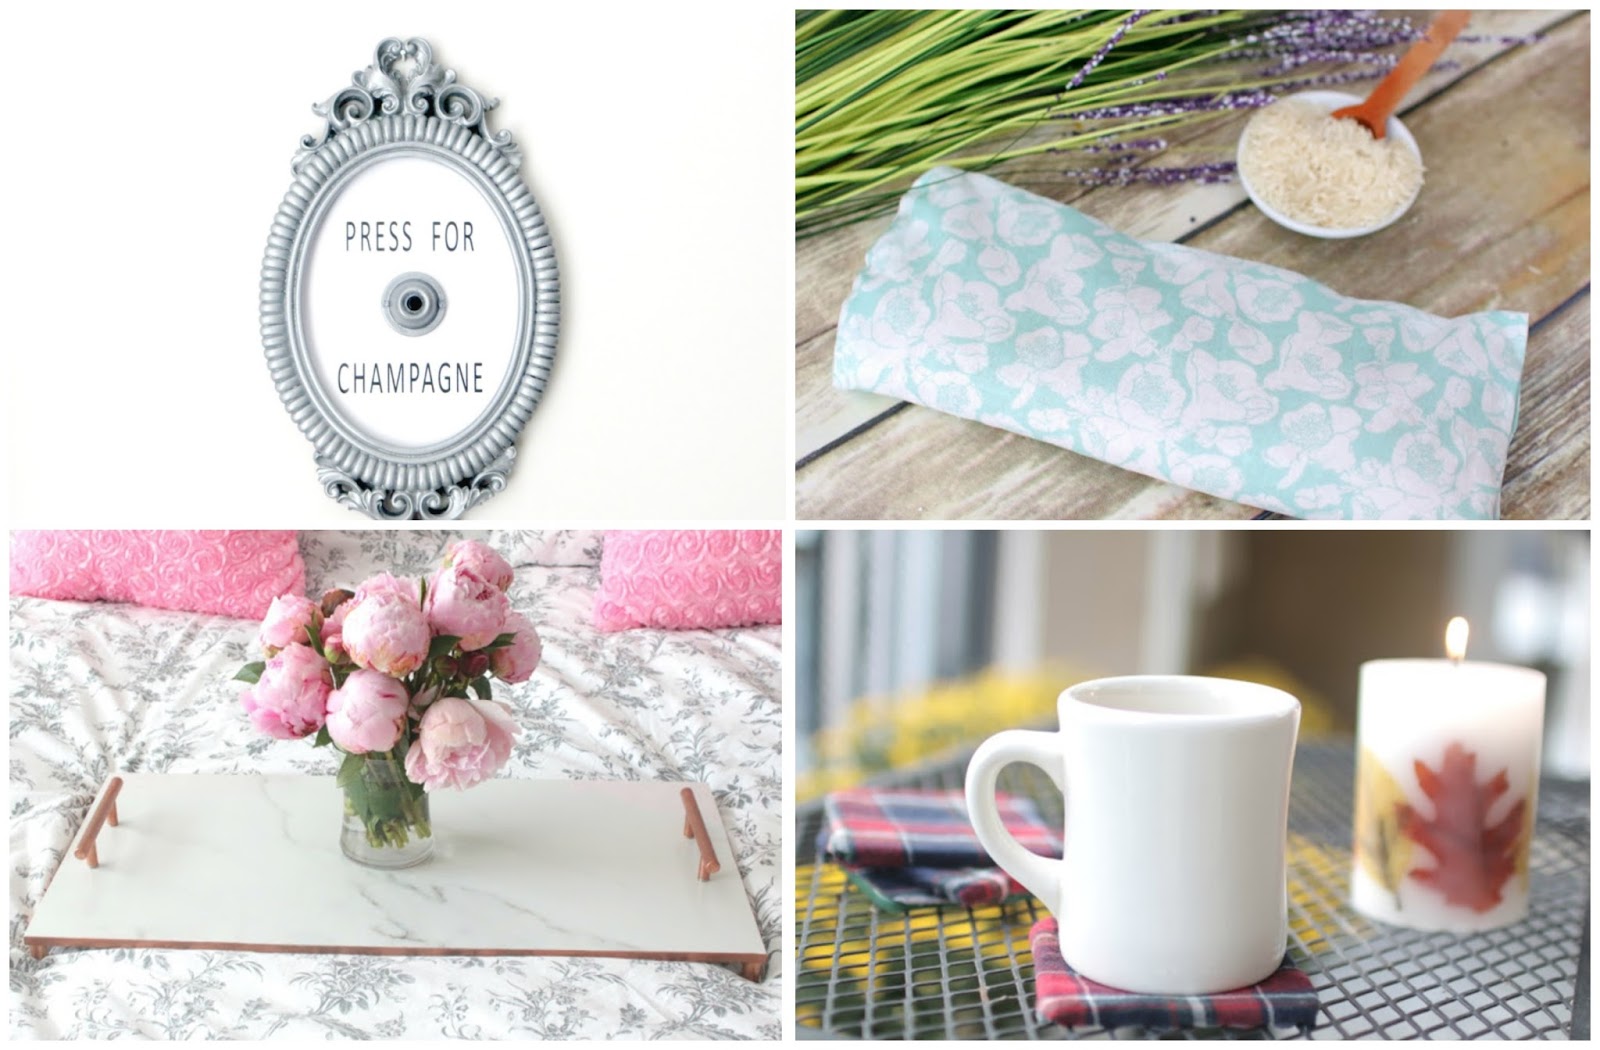
DIY Flannel Coasters

Want more? I have nearly 200 ideas (including face masks, hair treatments, and MORE)--just click the DIY tab at the top of your browser.

And here's a video of everything (plus some bonuses):


Which ones did you like the best?


Extra Elle:
I went to an Ugly Sweater party--I was the only one who wore an ugly sweater. You can only laugh, right? The funnier thing is that this is the second time this has happened!

Neutrogena giveaway--THREE WINNERS


$100 Gift card giveaway


12.12.2016

DIY Christmas Sprinkles Candle


The Elle Sees headquarters is in full-on DIY mode--expect a few more DIYS in the next two weeks. And today I wanted to share my annual candle gift with you--this was inspired by a candle I got 10 years ago as a present. I loved it so much and immediately recreated my own--it was such a hit that I've been making them ever since. This sprinkles candle is Christmas-inspired and I think you'll be surprised at how easy this is to make.

You'll need--
  • empty glass candle container
  • Christmas sprinkles (pictured are nonpareils, but sprinkles work better)
  • Karo syrup
  • wick
  • wax
  • fragrance

I've tried all sorts of things over the years to get the sprinkles to stay and the best is Karo syrup since it's clear. Coat the inside of your glass container with karo syrup. Since this was a votive, I used my clean finger, but for larger candles I use a brush. TIP: Reuse glass candle glasses to make these.

Shake the sprinkles around to coat the sides. You can coat the bottom as well, but make sure the wick is in first. Dump out the excess sprinkles.

Melt wax in an appropriate glass container (I used soy) and while it is melting, attach the wick to the bottom of the candle holder. Hot glue or some sort of glue will work well. TIP: If you have everything but the wax on hand, melt small tealight candles, just remove them from their metal holders first. Right before you pour, add in your fragrance and stir. I think I used a teaspoon of sugar cookies fragrance. I've used other Christmas scents too, like peppermint.


Carefully pour in the wax to the container. I suggest pot holders and using a glass measuring cup with a spout. I kind of eyeball how much wax I'll need so I can't give exact measurements since all containers are different sizes. Be sure that the wick stays up while pouring the wax. Allow to cool down. You can put these in the freezer to help speed up the process. As it's almost cooled at the top, you can add some more sprinkles on top for decoration.

TIPS:

  • Sprinkles (jimmies aka hundreds-and-thousands work much better since they hold color better--nonpareils will blur together color once you burn the candle.
  • If you don't coat the inside with enough karo syrup, the sprinkles will fall in once the hot wax is added.
  • Always be responsible when using candles.
Extra Elle:
Busiest weekend! Got my hair done--met niece and nephew to see Santa (they were in town visiting their family)--went out to dinner and a hilarious Christmas play--went to brunch with Atlanta bloggers--went to a pop up Christmas bar and it was so fun.


More candle ideas:


7.08.2016

Copper Marble Tray DIY

rose gold tray diy

Sometimes good things come to those who wait. In early 2015, I started making these marble trays for my friends and family, and even using them for blog backgrounds. Last week, several of you noticed one of the trays in a pic (finally!) and asked for a tutorial! It made my day, y'all!


As is typical with my craft DIY ideas, I'll see something for sale online that's ridiculously priced and will make it myself (like my Press for Champagne or these bracelets). I get this from my late Great Granny Sugar who always encouraged me to make something I wanted myself. Such is the case here. Look at how much these cost:

$290! $187! Forget it. My version can be made for under $20--even cheaper if you don't have to paint anything. While I've made these in different ways, today I am recreating the one in my Instagram pic that was requested. Here's how to make it:

diy marble tray


You'll need:
  • marble slab/marble tile/something that looks marble--I used a porcelain tile here that was 12x24
  • 2 drawer pulls
  • 4 copper caps
  • Epoxy
  • E600
  • Ruler, marker
  • Optional: copper spray paint, copper leaf pen, felt, copper caps
    • You can purchase these items at a hardware store or online.
copper pulls rose gold


Spray paint (if needed) drawer/cabinet pulls in a well-ventilated area. Allow to dry fully.

e6ooo
While those are drying, attach tray feet to bottom of tray. I used E6000. Use whatever you would like for the feet. I wanted some height on this tray so my feet are raised. You can attached a copper cap or felt, so it won't scratch the surface of whatever your tray is resting on.

diy marble tray


Using a ruler, mark where you'd like the handles to go. In a very well-ventilated area, mix and apply the expoxy to the handles to attach them. Let it set for an hour. I prefer overnight just to be sure.

marble copper tray diy pineapple
As an extra step, use the copper leafing pen to fill in the edges, as seen in the pic above, and demonstrated in the video below. This dries in about 10 minutes. And that's it! By the way, the pineapple was inspired by one that was $185. I got this one for $14.99 at Target (it's a candle) and painted it copper.

marble copper tray diy

I am obsessed with trays--I'm dead serious--I collect them. I even put trays on my trays. I use them for all sorts of things and as mentioned in the beginning, they make fab gifts.

marble copper tray diy coffe cup missoni peony

I want to note that while I figured this diy tray out on my own, there are plenty of other tutorials out there that make them in different ways. Now, who wouldn't love some morning coffee on a tray like this?

marble copper tray diy
Charlie wants you to watch the video below I made--it's only 3 minutes! Look at that face!! He makes at cameo at the end. Check it out below:


Do you DIY?

Extra Elle:
  • I finally found peonies at Trader Joes and bought them out--some of them are in the top pic of this post. They're my fave.
  • Short work today for me. I can get used to these holiday short work weeks! Have a great weekend!

9.04.2015

Over 20 Ideas for Empty Candle Jars!

This shop has been compensated by Collective Bias, Inc. and its advertiser. All opinions are mine alone. #LoveAmericanHome #CollectiveBias


Fellow candle fanatics, this post is for us! Do you switch up your candles for the season? I've mentioned it many times on here that I do. And since fall is around the corner, I headed to Walmart to stock up. I was immediately drawn to the American Home™ by Yankee Candle® brand candles display in the Home and Candle section:


I checked out all of the fragrances (of course!), and here's what I brought home with me:


These are a few different styles and sizes, but I bought the 12 oz. candles in Shades of Fall, Pumpkin Apple Harvest, and Banana Walnut Bread for $10.93. Remember to use candles with caution.


And I picked up this 2 oz. jar candle in Fresh Apple for $10.93. My house smells kind of amazing right now! But what to do with the empty candle jars at the end of the season? I've got a bunch of ideas to reuse them. First, I will freeze them for a few hours once I have burned the candle up. The remaining wax and cotton wicks will pop right out. Then I wipe out the inside and peel away the label. I wash and dry the jar and then it's ready to reuse! Check out over 20 ideas for empty candle jars:


Storage For Bathroom:
  • cotton balls
  • cotton swabs
  • cotton squares or pads
  • toothbrush and toothpaste
  • small jewelry--great way to keep rings from getting lost


Beauty Storage:
  • makeup brushes
  • lipglosses, lip sticks, lip crayons, lip balms
  • bath bombs
  • bath salts (mine are the purple ones pictured below)
  • nail polishes
  • manicure kit
  • bobby pins
  • hair ties
  • beauty samples


More Storage Ideas

  • candy
  • markers
  • craft supplies
  • crayons
  • dog treats
  • coins


Decorative Display:

I chose to take one of the empty tumblers and made an etched monogram:


DIY Etched Tumbler:

  • Using a clean, empty candle jar, place your letter/monogram/picture inside.
  • Take an etching cream purchased from the craft store and a small paintbrush and outline and fill in the letter on the outside of the jar/tumbler. Pictured.
  • Allow cream to set for 5 minutes and then rinse away. Be sure to follow directions and use precautions as printed on the etching cream's packaging.
Let me know your favorite candle fragrance or storage idea!

4.06.2015

DIY Ombre Crayon Candles

Hey you! How was your Passover or Easter? Speaking of Easter, that's what influenced today's diy. I was helping the Easter Bunny a friend last week assemble baskets for her kids. Inside were the usual treats, like chocolate and jelly beans. There were some Starburst candies too, organized by color. I opened up a few (my payment for helping out) and stacked them up, ombre-style. And immediately a fave diy idea of mine was remembered, but I didn't want to head out for supplies. Instead, I used what I already had, and thought you might like to see. Aren't those types of diys the best when you have everything you need? Keep reading to see how easy this is.

3.23.2015

Buy + Try: March Makeup Reviews

Hey you! I hope your weekend was just wonderful! Is it looking like spring where you are? Are you doing any spring cleaning? I did--sorta--I recently went through my drawers and cabinets and realized I had quite a few things I've not shared on here! Plus, I haven't made a video in a few weeks, so I combined both ideas and am doing a Buy and Try! I'll be sharing brief reviews of all sorts of things. Be sure to check out the video for more details on everything!

3.06.2015

DIY Tinted Lip Balm


Atlanta decided to be a flirt this week and gave us a brief taste of spring. One day was in the 70s--sunny skies! Ice cream! Flip flops! And today it's snowing! But that's fine with me because I've already gotten my house feeling all festive and flirty! I just needed pretty flowers, a flirtatious scent, and some new makeup. But since I'm on a spending ban, new makeup is out, so I decided to make my own. Here's my super fast and easy DIY Tinted Lip Balm. You gotta make those lips kissable, right?

Disclaimer:

All products mentioned are purchased by me unless stated.
All pics, thoughts, etc, are mine unless otherwise noted. Publishing or redistributing any content from this blog is strictly prohibited. Please seek permission first. Thank you.


Related Posts Plugin for WordPress, Blogger...