Showing posts with label jewelry. Show all posts

9.16.2015

Casual, Comfortable Fall Outfit Ideas


I am way too excited that fall is around the corner. It's my FAVE! And not just because my birthday is in fall (October). But because I love everything about it: sights, scents, sounds...and pumpkin anything. It gives me a chance to slow down after a hectic summer.
Summer was kinda crazy for me: I felt like every weekend I was at an event like a wedding, shower, or graduation. Now that fall (autumn if you're feeling fancy) is almost here, I feel like I can relax a little and get back into my regular routine. It's like a huge sigh before the craziness of the holidays. One of my favorite things about fall is the weather.
And when the weather changes, it's time to go shopping! Give me all the sweaters! So I recently went shopping at JCPenney to get started on my fall wardrobe. I was able to find everything I was looking for, from head to toe. They even have a Look Book at jcplookbook.com if you need more inspiration.


I was specifically looking for clothes that were casual, comfortable, that make getting ready effortless. I also wanted clothes to fit the occasion, whether it's work or play, and I like it when my style reflects me. When I look good, I feel better. Finally, I had to stick to my budget, and JCPenney had plenty of options to do so. So let's see what I chose!


Plaid and fall just go together, right? This red and black plaid shirt paired with black skinny jeans and black booties  I love because I can wear it while I'm taking care of the kids at work--we already have plans about the massive leaf pile we are going to make this year, or pumpkin picking.
I know a lot of you associate toasting marshmallows with summer, but for me, it's always been in the fall. Maybe because it's too hot for a bonfire? Anyway, I kept the same plaid shirt, added a cable-knit cardigan, boyfriend jeans, and leopard flats. I can't wait to wear this to a hayride--I'd switch out my flats for booties. I love to mix textures and colors.
When I am comfortable in what I'm wearing I feel empowered and full of confidence. And one of my favorite things to do when life slows down is volunteer. This is a typical Elle Sees Uniform--a cozy cardi,  layered under a tank top, with deep ruby skinny jeans, a scarf and leopard flats. 
That's my casual and comfortable fall style.
Leave a comment below letting me your know style for a chance to win a $100 JCPenney gift card!
Entry Instructions:
No duplicate comments.
You may receive (2) total entries by selecting from the following entry methods:
1. Leave a comment in response to the sweepstakes prompt on this post
2. Tweet (public message) about this promotion; including exactly the following unique term in your tweet message: “#SweepstakesEntry”; and leave the URL to that tweet in a comment on this post
3. Blog about this promotion, including a disclosure that you are receiving a sweepstakes entry in exchange for writing the blog post, and leave the URL to that post in a comment on this post
4. For those with no Twitter or blog, read the official rules to learn about an alternate form of entry.
This giveaway is open to US Residents age 18 or older (or nineteen (19) years of age or older in Alabama and Nebraska). Winners will be selected via random draw, and will be notified by e-mail. The notification email will come directly from BlogHer via the sweeps@blogher email address. You will have 2 business days to respond; otherwise a new winner will be selected.
The Official Rules are available here.
This sweepstakes runs from 9/16/2015 – 10/16/2015
Be sure to visit JCPenney’s brand page on BlogHer.com where you can read other bloggers’ posts!

4.09.2014

New Subscription Boxes: Lacquer Cabinet, Lily and Eve

If you've been reading this blog for oh, about 5 minutes, you'll know I am kinda obsessed with subscription boxes. I gotta catch 'em try them all! I've got two I was sent and that I tried out. Read on to see if there's a new one for you!


THE LACQUER CABINET
How it arrived!


Calling all of my polish fanatics! Introducing The “Lacquer Cabinet” – Nailtini’s exclusive lacquer delivery service featuring monthly limited-edition collections by leading nail and beauty artists, stylists and trendsetters. 


love these shades!

For $25 for 1 box/$23 for 6 months/$20 month for annual sub, you'll receive 3 full-size bottles and 2 clear bottles for your own mixology. This is a $44 value! I love that because I've been mixing my own polishes since I was little! These swatch exactly as shown, and I'm wearing the two solids in my Jergens video and Coffee and Chit Chat video. As of this posting, you can buy the past collections, including this one. I highly suggest checking this one out!

What I like:
  • full-size
  • 2 bottles for mixing
  • each collection is curated
  • 15% off tini products

LILY AND EVE

how it arrived!

If you're looking for something different and not just beauty-related, check out Lily and Eve. Lily and Eve subscription boxes include a group of handpicked lifestyle items from U.S. artisans. Past items have included vegan mineral makeup, soy candles, hand-stitched clutches, 5-free nail polish, holiday stationary, and statement jewelry. Occasionally, they include boutique style products that are non-handmade, but these will always be from small business within the U.S.


this shade is gorgeous! 5-free

Boxes are $19.99/month plus $4.99 s&h. March 8th is Women's Day, and the box was themed around that. The print definitely echoes that sentiment. The bracelet is made by Shanti Uganda, an organization in Uganda providing mothers with a safe care center and support system--you'll be seeing the bracelet in an upcoming video! Mint polish is 5-free and the color is Sweet Liberty. It is gorgeous on! If you're looking for a great gift or a fun treat, you gotta check them out!


What I like:

  • handpicked items
  • items from US artisans/small businesses
  • not just beauty--something for everyone


Have you tried either one of these subscription boxes?

3.11.2013

How To: Look Better When You're Sick


How was your weekend? Mine was spent battling this nasty atypical pneumonia infection I've got, but I watched tons of movies, thanks to your suggestions! I'm usually good at resisting colds (see my How to Kick a Cold tips) but couldn't escape this time. I was too sick to drive home for my Mama's birthday or even visit my friend JeWa for her birthday. Other than for walking Charlie, I ventured out once to get my hair done. Priorities! Anyway, when I posted the pic below of Sick Me on Instagram, so many of you sweetly responded that I looked great. I thought I'd share my tips with you. Enjoy!

sickie selfie

Ooh, I can't stand when someone tells me I look sick. "Sick" is a nice way of saying "awful" so if I can avoid looking like that, I will! Unfortunately, I can't just throw on some moisturizer and call it day. I need a little (ok a ton) more help than that, so for those days when I need to look nice, this is what I do. I'm going to give a lot of options here, so use what applies to you!

before/after

the tools

wipes, bb cream

  • Start off by using a wipe on your face. If your sickness is bacterial (aka not a cold), try Neutrogena Oil-free cleansing wipes in Pink Grapefruit. Your immune system is fighting your infection, and that can cause breakouts. I'm using these Radiance Wipes from Simple (review coming soon).
  • If your eyes are red, make sure you aren't wearing contacts and apply some eye drops. If they're puffy, try these eye pads.
  • If your lips are chapped, apply some lip balm. See my recipe here for a DIY lip scrub.
  • To blur imperfections, use your favorite tinted moisturizer/BB/CC cream. I'm using Maybelline Dream Fresh BB Cream.
conceal/brighten/contour 
  • Next, add concealer underneath the eyes to hide circles. I'm using Cover Girl + Olay concealer.
  • Try a brightening concealer to help hide the redness around the nose. Note: if the redness is severe, try a green corrector. I used Maybelline Age Rewind and a Sigma E50 brush to blend.
  • To add some color to my pale face, I lightly brush some bronzer (NYC in Sunny) along my temples, cheekbones, and my lower jawline. 
  • Noses tend to swell when we're sick, so I lightly contour the sides of my nose with the bronzer.
blush/waterline/lips/mascara
  • To help eyes look more awake, use a white or nude pencil to line to waterline of eyes. I'm using Studio Gear cosmetics pencil (see review of their products here).
  • You can also help eyes look awake with a champagne-shimmery shadow, but I skipped that today.
  • Curl lashes and add mascara if desired.
  • To add some more color, use a cream blush, like this one from Revlon. The color looks really bright, but it goes on so naturally.
  • Finish the look with color on the lips.
  • For my hair, I sleep on a satin pillowcase, which prevents tangles and frizz. I literally just raked my fingers through my hair and that was it!
after!


DON'T FORGET:

  • I separate the brushes I use when I'm sick from my other brushes by keeping them in a cup. Once my sickness is over, I disinfect them with rubbing alcohol. My favorite is the Sigma F80.
keepin' it real with dirty brushes


By the way, my earrings I'm wearing are from Anjolee! They're so pretty! Check them out for your jewelry needs, including Diamond Hoop Earrings and Diamond Stud Earrings


2.18.2013

PopSugar Must Have Box: February

How was your weekend? I did the usual routine of running errands, cleaning, and Netflix. I also played around with some new beauty products, of which many I'll be featuring this week on the blog. First up is my PopSugar Must Have Box for February. The box is $35 a month, features full-size products and premium items worth over $100 in beauty, fashion, home, fitness, food, and more. If you're looking for a box that has a little bit of everything, you'll love this box. I love it and it's my favorite subscription box. PS: Use the code REFERFRIENDS to receive $5 off your first order! Let's see what's in the February box, which is all about love and pampering:


Fashion: Brokedown Wrap--This soft wrap (like a soft towel with velcro) is perfect for after the bath/shower or while you're getting ready for the day. This is the background in the above pic.

Fashion: Hanky Pankys--I have to say I wasn't expecting this in a box! The colors varied, but I received pink. I also have to say I love these, want more, and will not be modeling these on the blog. ;)

Food: Mariebelle New Yoke's Tresor Box--These cacao nibs from the shop in SoHo are just right for those times when you want a little bit of chocolate or to top off a dessert.

Beauty: Revlon Just Bitten Kissable Balm Stain in Romantic--I already have this shade and love it! It moisturizes and stains the lips. I'm giving this unopened one away, so if you'd like, leave a comment saying you want it and I'll have random.org pick a winner!

Entertainment : Safe Haven book and Song Download--I admit I've read only one Nicholas Sparks book and it made me cry. I've seen the Notebook and it made me cry. Therefore, I'm expecting this book (now a movie) will make me cry. If you've read/seen it, let me know if it's good!

Home: Connoisseurs Quick Jewelry Cleanser-- I needed this! The gel and toothbrush set works on gold, platinum (um, don't have any), and gemstones.

Extra: Conversation Hearts--I've not had these since I was in elementary school! 


PS: For this week's The 52 Project, I'm attending a blogger event! My first ever! I'm scared, nervous, anxious, and have almost talked myself out of it a hundred times, but the time has come. Wish me luck!

 Add me on: Twitter         Instagram         Pinterest

12.28.2012

Easy, Quick NYE Hair, Makeup, Nail Ideas

How were your holidays? I'm safely home after visiting my family for the holidays. The worst part was sitting in traffic for hours and then deciding to take blog pics, hehe. Apologies in advance for looking so tired! Anyway, I think I enjoyed playing with the toys more than my nephews! Well, today I'm playing with my hair, makeup, and nails to give you some ideas for New Years Eve. These are easy and quick. Enjoy!

H a i r 
The easiest way to dress up any hairstyle (short or long) is to grab a sparkly headband. Instant glamour in seconds! Mine was on clearance at Ulta, but these can be found for any budget. Here are some easy and quick hairstyles for NYE:

Headband, clearance at Ulta//sparkly bun//top view

Side pony//updo//wavy hair + headband
Sparkly Bun
  • Place hair into a bun using your preferred method (I adore the donut bun since the sock bun doesn't work for me).
  • Add a headband on top.
  • Easier: Wrap the headband around just the bun.
Sparkly Pony
  • Straighten hair or curl it.
  • Pull into low side pony.
  • Add headband to finish the look.
Sparkly Updo
  • Curl/wave hair.
  • Collect hair as if you are going to put it in a ponytail.
  • Twist hair clockwise and bring the tail up.
  • Clip/bobby pin hair into place. I used Goody Spin Pins to hold my hair.
  • Add headband!
  • Easier: Put hair into ponytail and add headband or wrap headband around hair elastic.

E y e s
  • Place primer to the lid to avoid creasing and to allow shadow staying power.
  • Use NYX Jumbo Eye Pencil in Milk and place on the lid.
  • Sweep an aubergine (or whatever color you'd like) shadow into the crease and blend inwards.
  • Apply the sparkly aubergine shade into the outer v and blend.
  • Dust a sparkly white shadow on top of the white lid.
    • Sparkly shadow pigment can be purchased cheaply, like NYC or Wet N Wild. NYX makes great pigments for $3 too.
  • Add liner, mascara, and false lashes to finish the look.
  • I used the LE Wet N Wild Lust palette for this look.
  • Tip: If sparkly shadows sound too young or intimidating for you, try dotting the sparkles just in the inner corners of your eyes.
  • Tip: Use a Post-It note or tape to capture errant sparkly shadow.
  • If you'd like a golden shimmery look, click here.

N a i l s
  • I originally was going to use these Sally Hansen nail strips, but for some reason, they wouldn't stay on my nails. I must've gotten a bad box or something? So I decided to recreate the same effect on my nails.
  • Sparkly black polish (Ulta's Little Black Dress)
  • Layer fine gold glitter and chunky silver glitter (didn't do this step).
  • Add chunky gold glitter (Milani's Gold) and clear top coat.
try these polishes or polish strips//my black and gold glitter nails//my recreation vs. inspiration

Check out these other polish ideas (just use the colors you'd like):
Have a great weekend! Be safe, behave, and be well. Love, Elle

8.06.2012

How To: Inspired by The Bachelorette's Emily's Hair & Necklace

Happy Monday, loves! How was your weekend? I had a weekend of thrift store & Ikea adventures as well as brunch with a friend. I thought I'd kick off the week with a hair tutorial. Enjoy!

Today I'm sharing how to get The Bachelorette's Emily Maynard's hair. This hairstyle is a great way to get volume and loose waves. I'm using velcro rollers today for two reasons: to mix it up (most of my tutorials involve strictly a curling wand or iron) and because Emily is a big fan of velcro rollers. You can totally use hot rollers if you don't have velcro rollers. While my layers are cut different from Emily's, the curls are the same!
Here's how to:


T O O L S

Velcro rollers & clips can be purchased at any beauty supply store
  • Jumbo velcro rollers & clips--if your hair is shorter than mine, use large. The amount of rollers needed depends on the amount of hair. I usually need around 7. I use duck bill clips. 
  • Curling iron--This will be used to heat the hair. It makes the process faster instead of starting with wet hair, using a hair dryer, etc. I used a 1in 1/2 iron but the size of the barrel isn't important. A flat iron can be used if needed.
  • Other: heat protectant & hair brush--for obvious reasons; hairspray (I don't use hairspray but most of us do); and a smoothing product.

M E T H O D
This John Freida Frizz-Free Heat Protectant keeps frizz & heat damage away
  • Brush hair, apply heat protectant, and turn on curling iron.
  • You're going to divide your hair into 3 sections: the middle, starting at forehead going down the back of the head; and the sides. I like to separate the side sections with clips.
duck bill clips
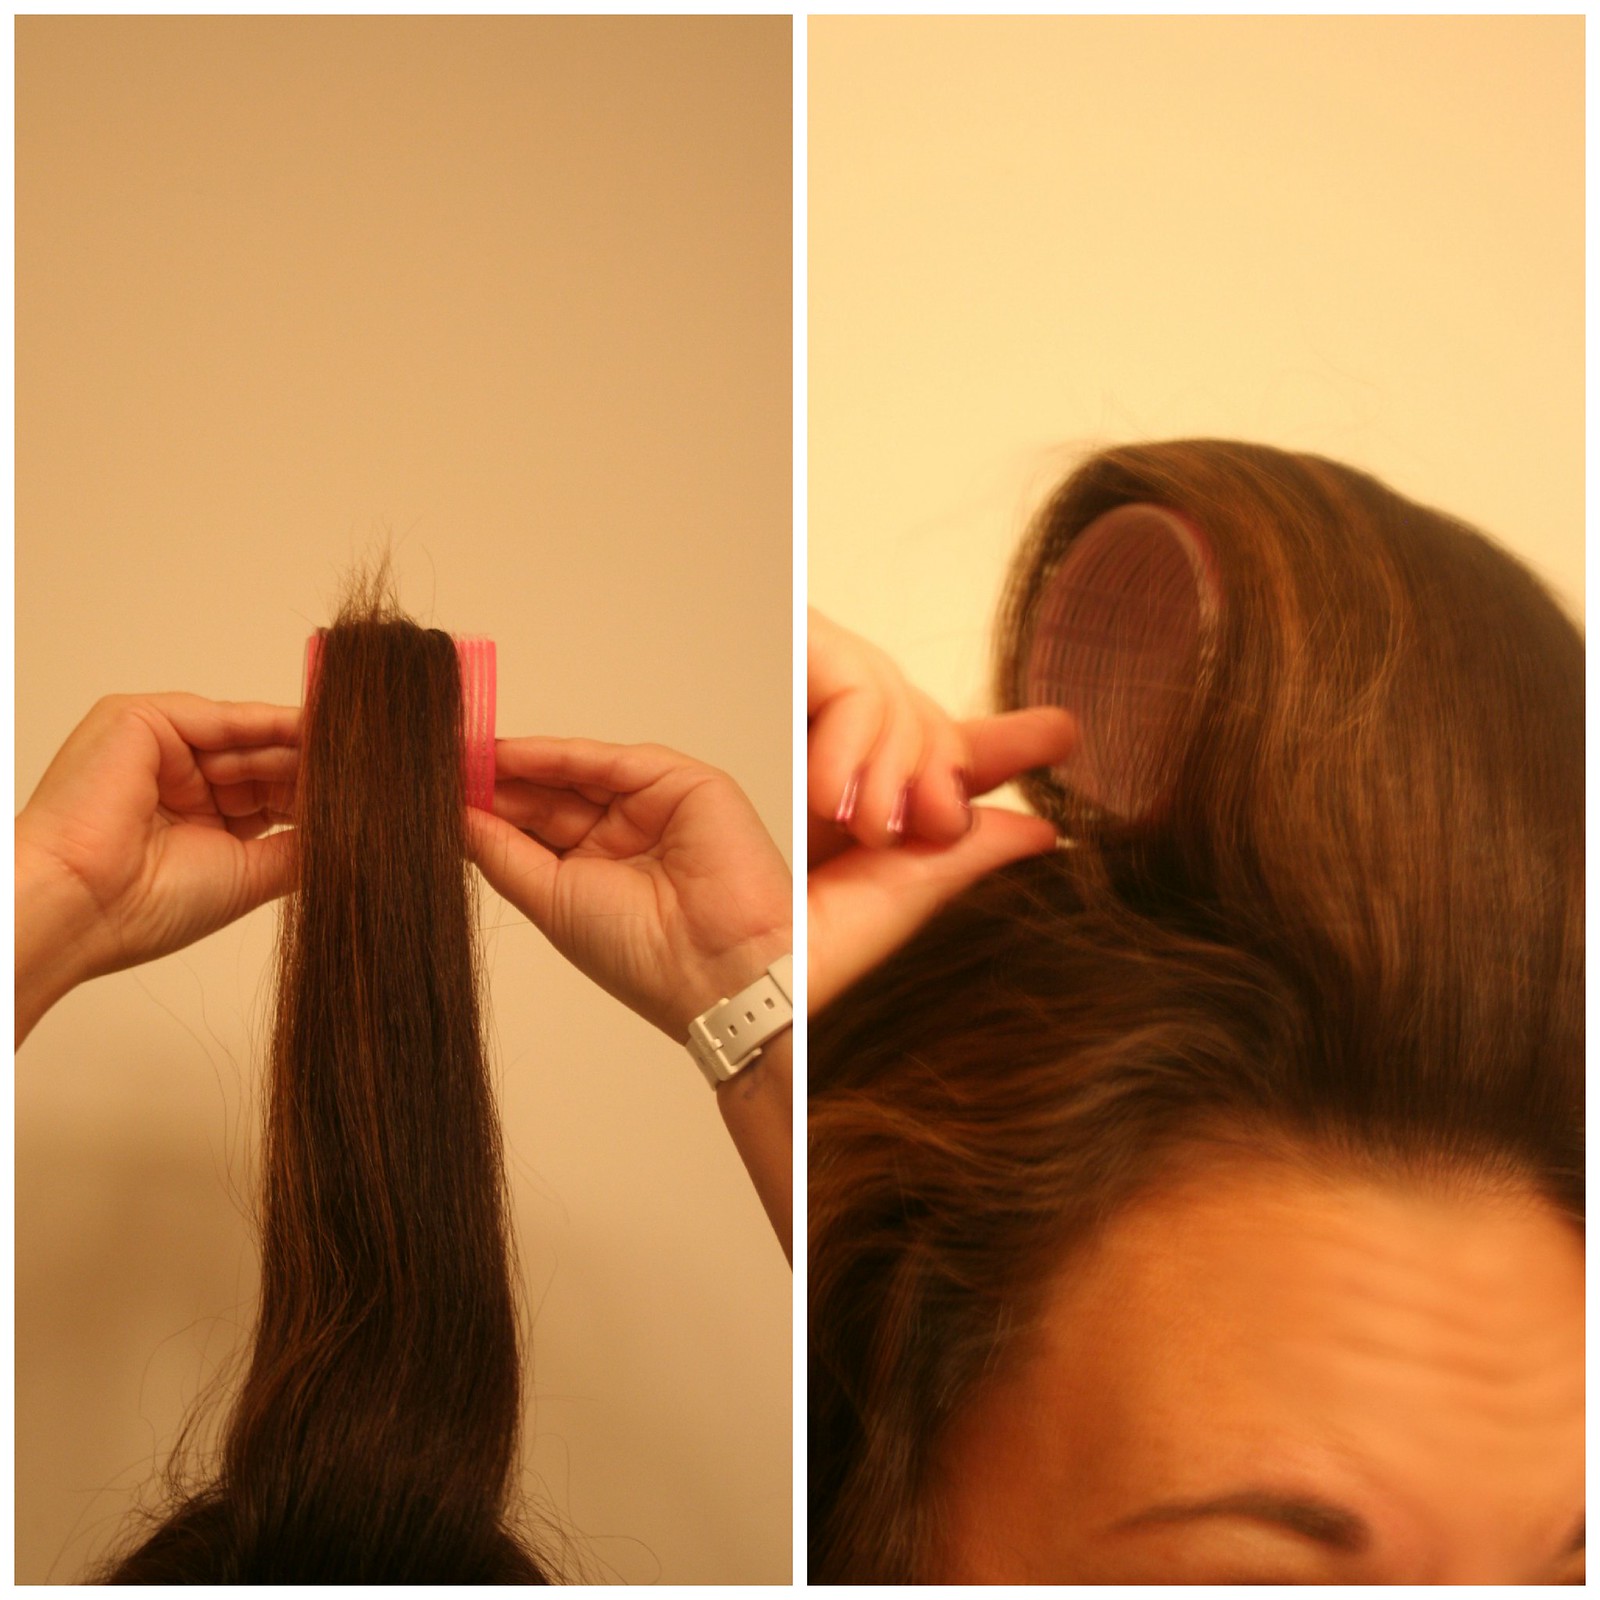
  • Starting at the top of the middle section, take a section of hair wide enough to wrap around the roller. 
  • Brush the section and use the curling iron to heat it. If you're hair is hard to curl, or just to insure the curl, go ahead and wrap the iron around the hair, starting at the end and rolling toward the roots. Hold for 5 seconds.
my curling iron is from here
  • Open the clamp to remove hair from the iron and then reroll hair onto the velcro roller. Secure with clip. Continue to do the same for the remaining hair in the middle section. This usually takes me about 3 rollers.
  • Next, take a side section and pull about a inch section. Instead of curling & rolling horizontally, curl & roll vertically away from the face. 
  • Repeat on the other side. 
  • Allow hair to completely cool--this usually takes around 5 minutes, if that. If you're really pressed on time, use the cool-shot button on your hair dryer to cool your hair down.
I got this for $5.99 (reg $18) at TJ Maxx. So good!
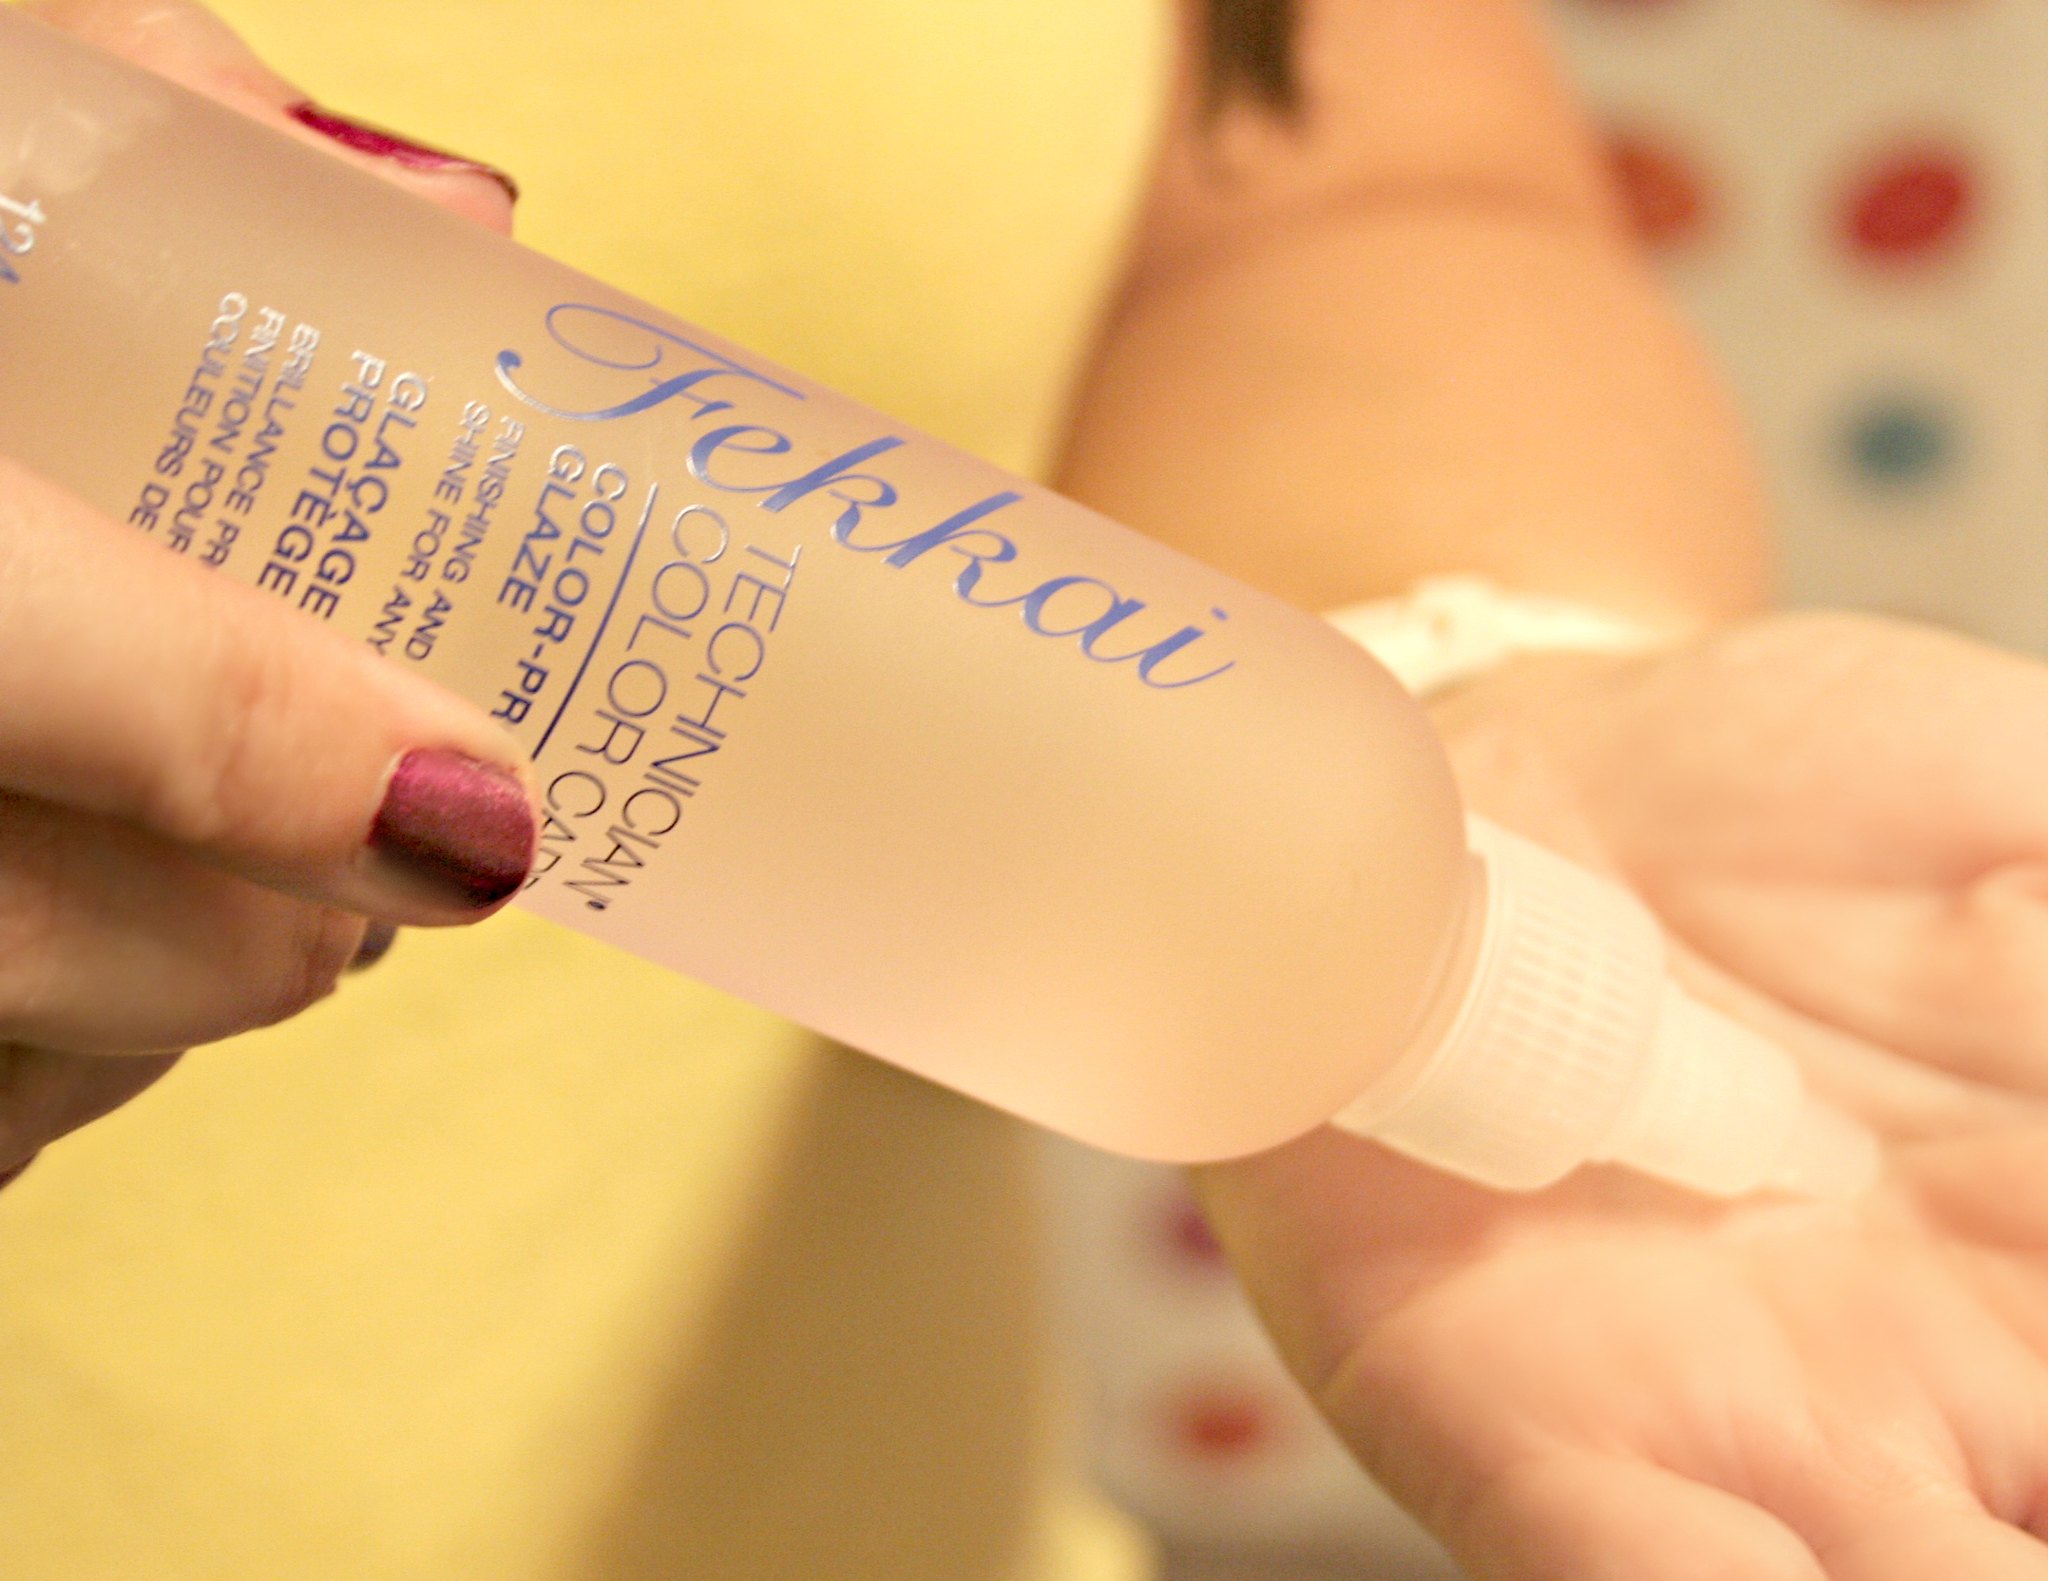
  • Carefully remove rollers and style with fingers. Make sure the curls framing the face are away from the face. Spray with hairspray if desired! I used a color-protecting glaze to smooth hair.

The Finley necklace I'm wearing is just like the one Emily wore in The Bachelorette (episode 1)! Isn't it super cute and dainty? It was given to me from Towne & Reese! You can get your own, or any of their beautiful pieces, by clicking here. Go now!


And ElleSees readers get a 10% discount now until August 14th with the code ELLE10.


  • Check out more velcro tutorials from me here and here.

7.31.2012

DIY: Neon Bracelets

From the Lost ElleSees Files: I started this DIY post about a year ago and never posted it. Oops. The pics weren't the best quality & I can't find all of the pics, as I originally showed around 6 different bracelet ideas. If you'd like to see the rest of the bracelets, let me know, and I'll do a tutorial. In the meantime, enjoy these really easy DIY Neon Bracelets. 


Need to spruce up those summer accesssories? Make these easy neon bracelets--use the colors and designs you like, as these are just a few suggestions. Make one, make more, and stack them. The best part? You probably have most of the tools already. Here's how:


WHAT YOU'LL NEED
Neon thread
washers
beads (I used silver, and make sure the beads are large enough for the thread)
jump rings
scissors


Washer Bracelet

  • Loop thread around the middle of your hand about 6 times.
  • Cut in half. You now have two pieces.
  • Take piece one and half that.
  • Push the looped end through the washer.
  • Take the other end and bring through the loop, making a knot.
  • Take piece two and repeat on the other side of the washer.
  • Tie the ends of each piece together and trim excess.


Looped Bracelet

  • Wrap thread around your palm 6 times.
  • Fold and cut until you have 4 even pieces.
  • Tie one end of 4 pieces together and tape down.
  • Take one piece and thread jump ring through.
  • Tie a knot through it.
  • Move a little further down and add another ring. Knot it.
  • Repeat at least 2 more times on the first piece.
  • Repeat process on remaining 3 pieces of thread.
  • Tie all ends together in knot & trim excess.


Braided Beaded Bracelet

  • Wrap thread around palm 6 times.
  • Fold thread and cut until you have 3 even pieces.
  • Tie pieces in a knot and use tape to secure them to table.
  • Braid 3 pieces around 3 times, and then slide a bead up the middle piece.
  • Braid 3 times again (you can braid once or more, but I randomly chose 3) and then add another bead.
  • Repeat process until finished.
  • Knot pieces and cut off excess.
Finished bracelets with my Swatch Watch & sunnies from the 80s!

7.19.2012

Get the Look: Emily's Towne & Reese Jewelry from the Bachelorette


Are you a fan of the Bachelorette? The finale is this weekend! Emily wore some adorable pieces this season from Towne and Reese. Towne and Reese is a beautiful jewelry line of earrings, rings, bracelets, and necklaces. Check out exactly what she wore here: http://www.towneandreese.com/blog/what-emily-wore-our-complete-list/


Here are some of my favorite pieces Emily wore:


Want your own Towne and Reese pieces? You can get exactly what Emily wore and more! Use this 10% discount on anything on the site - "BACHFINALE10" (active until next Wednesday, 7/25).

Connect with Towne and Reese on their websiteFacebook, or follow them on Twitter

6.21.2012

Outfit of the Week: Sailing to Nowhere


Once upon a blog, I used to post weekly outfits. And then they became monthly. And then whenever I felt like it. I'm more apt to post outfits on Twitter or Instagram (ellesees). I feel more comfortable showing you my hair! ;) I've since lost followers over it (boo), but daily/weekly photos of me is just too much me. But due to requests, here's one, and who knows, maybe I'll start posting them again?

When: Monday
Where &Why: Birthday dinner for bff
Heard: Sailing to Nowhere, by Broken Bells

Sailing To Nowhere (Album Version) by Broken Bells on Grooveshark
Wore:

What was your favorite outfit you've worn lately?

5.07.2012

Outfit of the Week: Black, White, and Blue


Outfit of the Week: black, white, blue

When: April 27
Where: Driving
Why: Because home is nearly 5 hours away
Heard: Black, White and Blue by Ladyhawke
Black, White & Blue by Ladyhawke on Grooveshark


Wore:
  • I'm wearing a black Dolman sleeve shirt from American Eagle (similar & I like it better)
  • White shorts from Old Navy
  • DIY Morse Code necklace (mine says ILY).
  • Gladiator sandals
  • Flat Iron curls
  • Kate for Rimmel red lipstick
  • DIY Frame
  • Now where does the blue come in, you ask? The trip for me was bittersweet. My Lil Sis turned 17. I can't believe it! She's still 3 in my eyes and has exactly the same laugh.
  • Also, it was the first time I've gone home since my beloved Sugar passed away. It was always a tradition to stop by and visit Sugar on Sundays. It was just the two of us, and I'd get her caught up on everything in my life. She was always so proud of me (all of us) and my biggest supporter. Then, once she moved into the nursing home 5 years ago, I still made those Sunday visits, every month. I know she's not here anymore, but it's like I still can't believe she's gone. Bittersweet. 

QUESTION OF THE WEEK:
What tv family would you move in with for a week?
I always loved the Cosby Show as a kid--I just knew that show was real.


4.30.2012

Outfit of the Week: Mint Car


Outfit of the Week: mint car


When: April 20
Where: Kroger, where I always run into Sharee from RHOA
Why: the gathering of items for my current smoothie kick
Heard: Mint Car, The Cure...I'm a big Cure fan!
Mint Car by The Cure on Grooveshark
Wore:


Can you see the Tarte Lipsurgence
It looks orange in the tube, but is such a pretty color on!

QUESTION OF THE WEEK:
Have you ever been on the local news?

I was! Sorta! I walking into Trader Joes, wearing a yellow cardigan, when I slipped in the rain and fell! The local Atlanta news was talking about some event that had happened earlier, and there I was in the background! So embarrassing


Disclaimer:

All products mentioned are purchased by me unless stated.
All pics, thoughts, etc, are mine unless otherwise noted. Publishing or redistributing any content from this blog is strictly prohibited. Please seek permission first. Thank you.


Related Posts Plugin for WordPress, Blogger...