


How was your weekend? I was in a cabin in the woods, with an occasional cell signal & no internet! If you follow me on Instagram (ElleSees) you saw my pictures. It was relaxing and nice to have a, albeit forced, technology break!
While I loved the pond and creek near the cabin, I'm a beach girl at heart. I thought I'd share this nail tutorial with you that reminds me of ocean waves, but oddly enough was inspired by my Tilex bottle! Seriously, but Tilex Nails doesn't sound nearly as fun as Ocean Waves. And they're easier than you think to achieve! Here's how to:
T O O L S:

- Mint Polish (I used Wet n Wild's I Need a Refreshmint $1.50)
- White Polish (NYC .50)
- Sponge (I used make up applicators=free)
- Clear Coat ($1)
- Polish remover ($1)
M E T H O D:
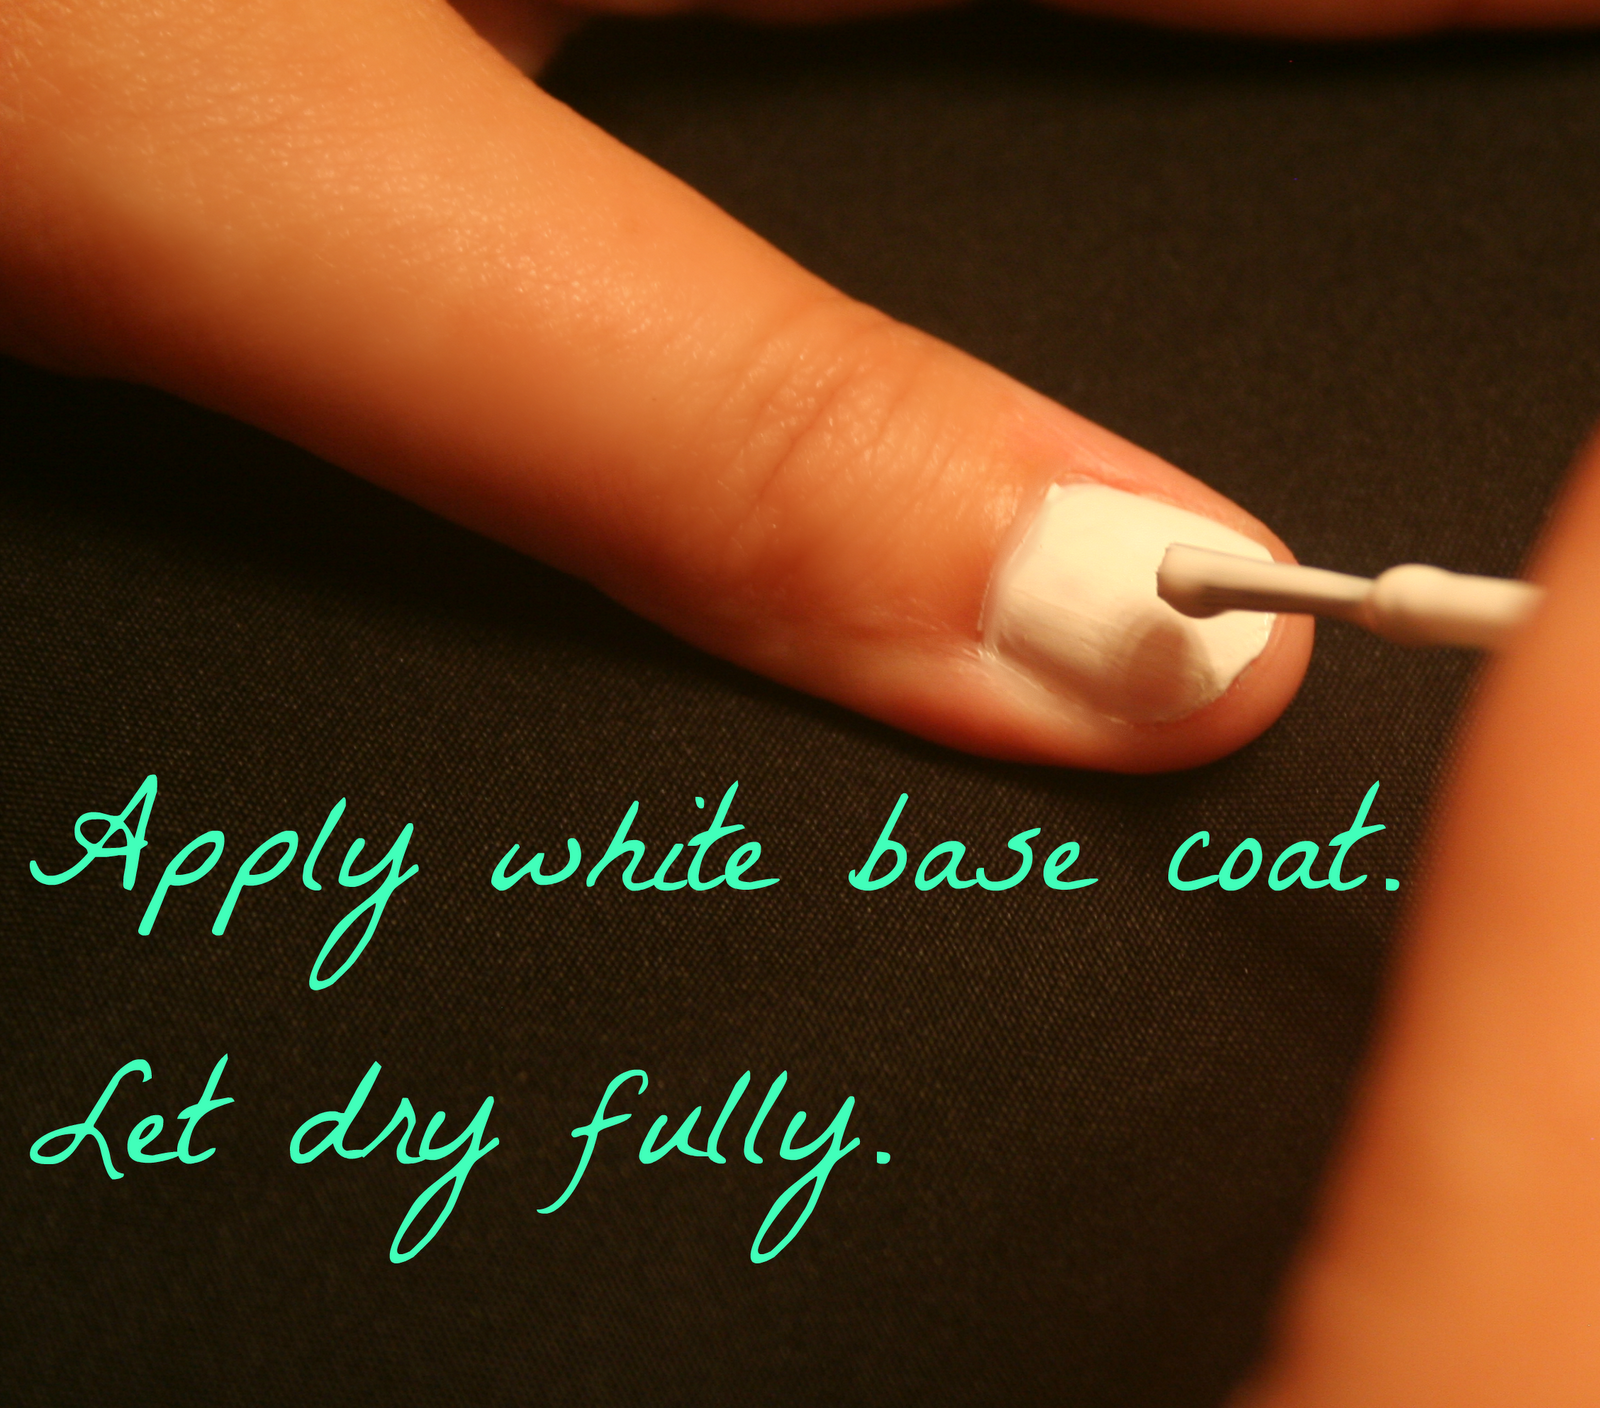
- Apply a white base coat and let it completely dry.

- Since I have tons of makeup applicators I don't use, I decided to recycle them. You could also use a makeup sponge, but these makeup applicators are smaller, so there's less clean up, and easier to use.
- Paint the mint polish on about 1/3 of the nail. You can either apply paint to the applicator, or dip the applicator into a small pour of paint.

- Dip the applicator in the white paint.
- Next, start at the bottom of the mint color and dab the white paint onto it. The mint paint doesn't have to be dry.
- Stop a little over halfway up the nail.
- Repeat this with the mint paint, just trying to blend and create that gradient effect.

- To finish, dab the applicator into the mint and then the white to blend them together.
- Apply this to about the midpoint of the nail, to help blend and create the gradient effect.
- The bottom of the nail should be white, the middle a blend of both colors, and the tip of the nail is mint, with no white mixed in. Play around with it. Too much white? Add mint! And vice versa.

- Since you're using a sponge, you'll notice sponge marks. Once you've achieved the effect you want, paint the wet nail with a quick-dry or clear coat. This will further help blend and smooth out the bumps or marks. Let dry, and apply another clear coat if desired!
- Clean up edges with polish remover.
T I P S:
- Keep playing with the colors--too much white? Add mint. And vice versa.
- Don't use too thick of coats or paint. Try dabbing the applicator or sponge on paper before applying to nail.

Ocean Waves Gradient Nails

The inspiration: a bottle of Tilex!
Yes, I'm weird.
PS: I have MANY more nail tutorials in the weeks to come!
Now, tell me about your weekend!
This is a really cool look and really easy to do, at least you make it look easy.
ReplyDeleteNice grip.
ReplyDeleteI adore this nail technique. Very creative.
ReplyDeleteGlad you had a relaxing weekend:) ANd LOL on your inspiration...Tilex...heehee....
ReplyDeleteWhat a neat post! How perfect for summer. :)
ReplyDeleteGorgeous nails - loving the color!
ReplyDeleteI saw your pictures on Instagram Elle! They were gorgeous. Fab nails girl.
ReplyDeletehttp://www.averysweetblog.com/
i need to try this as well
ReplyDeletethanks for sharing
have a nice and stylish week darling
come and say Hi,
The Dolls Factory
Cute nails. I will have to try this out one day.
ReplyDeletevery cute!
ReplyDeleteEveryone needs a break from technology every once in a while, even if it's forced :) I love how pretty your nails turned out!
ReplyDeleteOoh I was going to post this tutorial too (in different colors!) I love the mint color!
ReplyDeletexoxo,
Chic 'n Cheap Living
Those are really lovely - and perfect summer nails!
ReplyDeleteCourtney ~ http://sartorialsidelines.com
Sounds like a relaxing trip; I love getting back to nature every once in a while. It helps me find my center. Love your nails; never would have thought to use a make-up applicator!
ReplyDeleteyour nails came out great!!
ReplyDeleteLove, love, LOVE! And you know I'm a beach girl right there with ya :) xoxo
ReplyDeletehaha! you find inspiration wherever you look!
ReplyDelete♥ laura
the blog of worldly delights
the shop of worldly delights
Now this is a nail DIY that I think I can actually complete!
ReplyDeleteSo pretty! And it looks easy enough! :)
ReplyDeleteThe mint polish is pretty, very creative that you can find inspiration in every day things like tilex bottles!
ReplyDeleteThis is so amazing! I love nail polish :) My weekend was spent with 25 Latina entrepreneurs - love my job! We shopped, enjoyed Latin owned business site visits, and of course, pool and beer time. :)
ReplyDeleteHow pretty–and they totally match the Tilex bottle!
ReplyDeleteOMG that looks awesome!!! I love how you chose the mint color to make the gradation! I'm totally going to try this with my nails!
ReplyDeleteI would love for you to visit my blog sometime!!
:)
Allison
afashionfiles.blogspot.com
That is so fabulous!
ReplyDeleteI lovvveee that!! Unfortunately I could probably only do that on one of my hands. lol
ReplyDeletelove this! great idea elle -
ReplyDeleteXo Megan
this is so cool! the colors are fresh! :)
ReplyDelete<3, Mimi
http://whatmimiwrites.blogspot.com/
Want a summer scarf? Enter to win a $20 ScarvesDotNet Gift Certificate!
Pretty cool! I like that you used the eye shadow thingy.
ReplyDeleteThis is really cute and fun!
ReplyDeleteLove the ombre effect- very pretty!
ReplyDeleteLooks great! Love your inspiration!
ReplyDeleteJayme & Mendi @ Her Late Night Cravings
Oooh interesting. I use a makeup sponge to get the gradiant/ombre look :)
ReplyDelete